Friday, December 18, 2009

Merry Christmas!

I hope all of your Christmas crafts and projects came together! I'm finally done and going to enjoy the rest of the holiday craft free :-). Here are a few pictures of just a few of the projects I did in just this past week. I'm exhausted and ready to just relax, enjoy the moment, and get rejuvenated for the new year.

Wishing you all a wonderful Christmas and Happy New Year!

Friday, December 11, 2009

Sisterly Love

I have loved this project! A client ordered this quilt to be made for her sister for Christmas. It's a full size quilt. Same design as my baby blankets but for a mom. I LOVE the fabrics, especially the special textured minky I picked for the backing. It is so cozy and will last a lifetime! I hope she loves it!

Tuesday, December 8, 2009

A Couple Embroidery Projects

Here's two embroidery projects I finished yesterday (the two I can post, which don't involve presents for people who check this blog!).
This goes to a very special bday girl whose bday is Christmas day!

This is a very lovely knock off from Pottery Barn. Amazing 700 thread count sateen hemstitch sheets from Target, some monogramming, and you have yourself some several hundred dollar Pottery Barn sheets!

It's Beginning to Look a Lot Like . . .


Christmas!!
Which, for me, means lots of sewing! I feel a little like Santa's elf working nights to finish presents! I Love Christmas- everything about it! Enjoy the moment :-)

Wednesday, November 11, 2009

Twirly Skirt

I made this Twirly Skirt for Jayne last night and it turned out so cute! I followed this online tutorial. Click HERE for the link to the tutorial. Some of the instructions were a little sparse but I figured it out and it turned out so cute. I'm going to make another today with some fabric Jayne had me buy months ago to make her a skirt. She's got another SC outfit ready for Saturday! Fight on!

Tuesday, November 10, 2009

Love the Bag

I put this bag together for my friend for her Bday! I just loved how it turned out and really want one for myself now.

Also got some custom pillowcases, a lovey, and a another friends custom Baby Blanket done. Pictures of that to come. I can't wait to get picture with the new baby in it!

Monday, November 2, 2009

Happy Halloween!

I decided to make this Halloween inspired table runner and some throw pillows to add to my Halloween decor this year. I just bought some fabric and made this up. I did 4 black square pieces in the middle for my center piece, then did a pinwheel on either side of that, then 4 nine-patch blocks on either side of that. I pieced the back together, quilted it, and added some thick black rick-rack on the edging. I think it turned out very "halloween'ish".
I LOVED how the cupcakes turned out on my new cupcake rack I got for my bday! Besides red velvet, I think this is my new favorite cupcake recipe cause I just love anything with chocolate chip cookie dough in it! I got this from my Etsy Busy Mom's Team Blog. Here it is....

Chocolate Chip Cookie Dough Cupcake!

Ingredients:

* 1 1/2 cups all-purpose flour
* 1/4 teaspoon sea salt
* 1/2 cup butter, softened
* 1/4 cup white sugar
* 1/2 cup brown sugar
* 2 teaspoons vanilla extract
* 1 cup miniature semisweet chocolate chips

* 1 (18.25 ounce) box yellow cake mix
* 1 1/3 cups water
* 1/3 cup canola oil
* 3 eggs

Directions:
  1. Whisk together the flour and sea salt; set aside. Beat the butter, white sugar, and brown sugar with an electric mixer in a large bowl until smooth. Add the vanilla extract and beat until smooth. Mix in the flour mixture until just incorporated. Fold in the chocolate chips; mixing just enough to evenly combine. Form the dough into tablespoon-sized balls; place onto a baking sheet, and freeze until solid, about 2 hours. (This "cookie dough" is a slight variation from the kind that you cook - it has no baking soda or eggs. Since it won't actually cook, there is no need for these ingredients... not to mention the risks of eating raw eggs.)
  2. Preheat an oven to 350 degrees F (175 degrees C). Line 24 muffin cups with paper liners.
  3. Beat 3 eggs in a large bowl with an electric mixer to break up. Add the cake mix, water, and canola oil; continue beating for 2 minutes on medium speed. Spoon into the prepared cupcake liners, filling each 2/3 full. Place a frozen cookie dough ball on the top center of each cupcake (as it cooks, the cake batter will envelop the cookie dough - the cupcake will cook, while the cookie dough only defrosts!).
  4. Bake in the preheated oven until a toothpick inserted into the cake portion of the cupcake (not the cookie dough ball) comes clean, about 20 minutes. Cool in the pans for 10 minutes before removing to cool completely on a wire rack.

Wednesday, October 28, 2009

Second Craft Show

My Mom and I did our second craft show last Saturday. It went well. There were more people than the first one but more of our cheaper things sold, so in the end we ended up doing about the same. It was a fun show and we're definitely learning a lot. I have a whole list of shows I want to do next year. For now, I'll go back to my Etsy shop and start on my christmas presents :-)

Designer PiIlow

For my Grandma's bday, my mom made her this beautiful quilt called Tag Sale in these beautiful colors! I helped with a few of the nine patch squares, but my mom worked so hard. So I took her scraps and did this embroidered monogram as an accent pillow for her bed. It turned out so beautiful! I love these fabrics!

Thursday, October 15, 2009

New Office

I know it doesn't look like much. But it's mine. And lots of space...with lighting...everything organized where I can find it!

Wednesday, October 7, 2009

Craft Fair

We had a wonderful time at the craft fair! We had no idea what to expect from this particular craft fair (some are great and some aren't). I think this one was average. It was pretty cheap for a booth, so it was totally worth it and we did pretty well in our sales. We'll see how it compares to others this year to see if we'll return next year. But for now, I'm pretty happy we did so well and that it's over! I also moved my entire house in 3 days, only 1 day before the show. My mom and I did the booth together and she saved me. I'll step up and prep more for our next one. At least I got my products done :-)

I'll post pics of my new sewing space/office that I'm so excited about when I get back from volunteering all weekend, and some exciting info. about some new products! Check back next week!
Lighting is harsh since it was 9am. The next one is indoors, we'll get better pics :-)

Monday, September 28, 2009

Sewing Up A Storm

I have been trying to finish some projects to add to my collection of blankets for an upcoming craft fair. The fair is 1 week away, and now we are moving our entire house this week too, just days before the craft fair. I promised my husband I'd pack up my sewing stuff and actually start packing our house before the movers arrived, so I've got to put the machine down. :-) I think I have a nice sampling of things and we'll see how it goes. Depending on what sells and what feedback I get, I'll know what to make more of for the next craft fair in 2 weeks. These are my first craft fairs!! Wish me luck! I'll post some pics next week from the fair with an update. But for now, I'm back to packing....
Bags
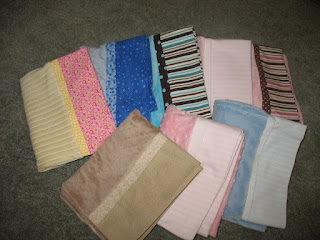
Pillowcases
Sun Dresses ( really wanted to get more of these done and have the fabric, but ran out of time, maybe for the next fair)

Tooth Fairy Pillow's

Plus my normal stash of blankets from my website :-)

Wednesday, September 23, 2009

Custom Bedding Set

Just finished this adorable custom bedding set this week! It turned out so cute. I love the monograming. The non-minky fabric is all a soft corduroy. And of course there is tons of soft minky too! This order includes the bumpers, dust ruffle, pieced quilt, receiving blanket, pillow, and set of 3 burp clothes.

Wednesday, September 16, 2009

Custom Minky Pillowcase

I just finished this adorable custom pillowcase today. It turned out cute, but even cuter if you know it goes with this...

Tshirt Dress & First Day of School

I saw an adorable Tshirt dress at Nordstrom for $40 and thought that I could make something just as cute. I found some instructions online here for how to make a tshirt dress. I think it turned out adorable! My daughter wore it for the first day of school. She also had to bring a little pillow to leave at school. I had forgotten about it until I got an email reminder the day before from the teacher, so I whipped up this pillow for her the night before. She LOVES it and wishes she could bring it home with her. I'm glad she has something at school that she'll be reminded of her home, and how much we love her. Happy Back to School!

Monday, September 14, 2009

Recipe- Strawberry Jam

Here's a quick tutorial on how to make your own strawberry jam, using the inversion method. The great thing about this method is that you don't have to have professional jar sealing equipment, it doesn't take up room in your fridge or freezer and will last on your shelf for a whole year (refrigerate once opening), oh and it's not runny. It has the same texture and consistency of store bought Jam but taste's better! These make great gifts especially around the holidays, so hurry and get some strawberry's before their out of season and get some holiday gifts done :-)
Step 1: Put your jars in the dishwasher and clean. Do this about 30/45 minutes before you want to start making your jam.

Step 2: Clean, hull, and cut up your strawberry's. 1 big box is usually enough.

Step 3: Bring a pot of water to boil. In a separate pot, place all of your jar lids and band seals. Once your water is boiling, pour the boiling water into the pot with your lids. They should be covered. Leave these there until the end.

Step 4: Crush up your strawberry's. If you're making Jelly, then you would use a cheese cloth and get all of the chunks and seeds out. You'll also use a different amount of sugar and berry's. This recipe is for Jam, so it should have some fruit chunks and the seeds are ok. You need 5 cups of strawberry's crushed. Measure this out and place in a big pot on your stove.
Step 5: Measure out your sugar and have ready in a bowl on your counter. For this recipe you need 7 cups of sugar.
Step 6: Add 1 package of Sure Jell to your strawberry crush mixture in your pan. Have on medium high heat. Stir until Sure Jell is completely dissolved. You can also add a table spoon of butter at this time to reduce foaming. Bring to a rolling boil (a boil that doesn't stop bubbling when stirred). Keep stirring continuously.
Step 7: Pour in your bowl of sugar all at one time. Stir continuously until totally dissolved. Bring back to a rolling boil and boil while stirring continuously for 1 minute. Remove from heat/flame.

Step 8: Use a spoon and scoop out any foam that you have on the top of your Jam.
Step 9: Get your clean jars out of the dishwasher (it is ok, if their still hot). Ladle the jam mixture into the jars (I use a funnel) and leave about a half to 1 inch from the top of the jar. Do this quickly while your mixture is still very hot. Get tongs and remove your lids and jar seals from the boiling water. Gently pat dry with clean towels and place on the jars. Screw them very tightly closed. When they are all closed, flip the jars over (so their upside down) and leave for 5 minutes. (set a timer)
Step 10: When the timer goes off, turn your jars back so their now right sides up. Leave on your counter until cool (they don't completely seal until completely cooled), then store on your shelf for up to 1 year. Refrigerate after opening. Recipe yields about 8 Cups of Jam!
**To check to make sure your seals are complete, you can push down on the middle of the jar lid and it should lay flat and not bounce up and down. You will hear them pop as they seal as the jars cool.
*There's also a recipe in the Sure Jell packet. Just follow the directions for Strawberry Jam and use the inversion method.

Have fun and enjoy your Jam and Bread!